Monday 14 May 2012

Dot dot dash

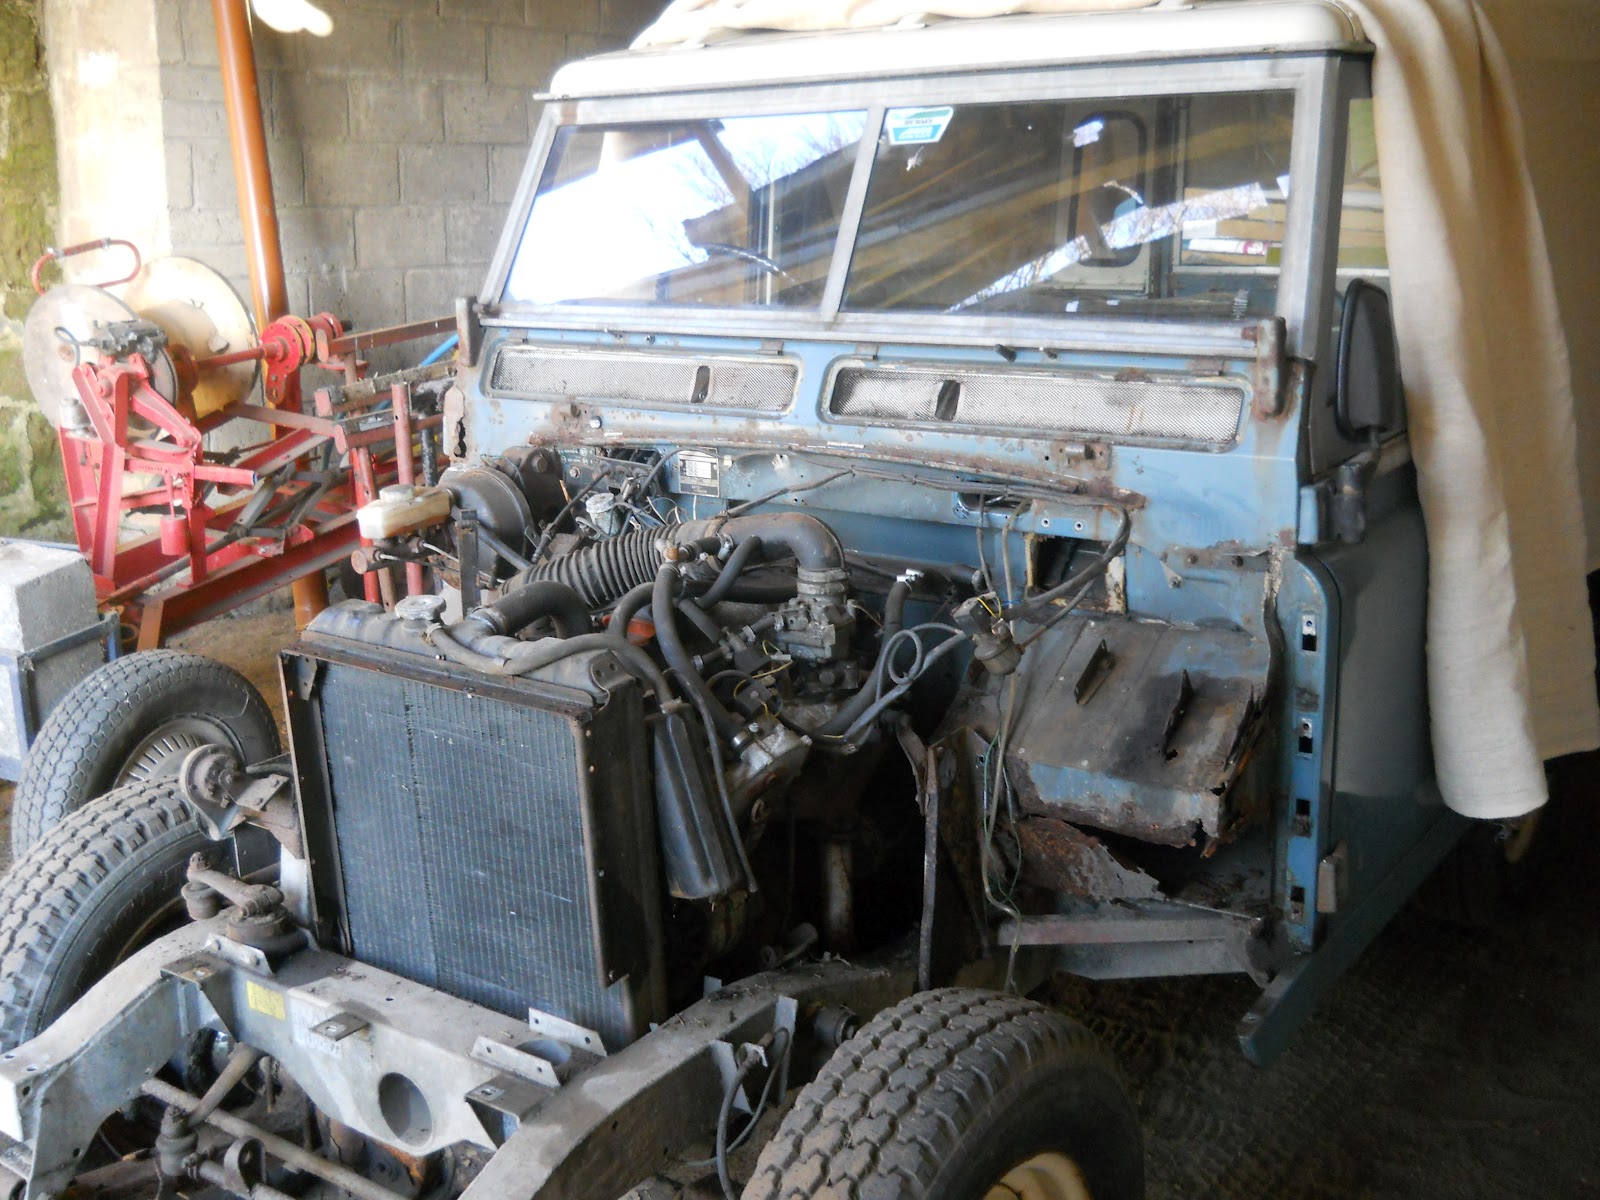
This evening I decided to tackle the dash and control binnacle. This is probably the most fiddly of all the areas on the bulkhead and so armed with my compact camera to record as much of the wiring arrangement as possible, I set about removing the upper dash cover, heater vents and heater controls. The next step was to settle in a remove the control binnacle and carefully log the wiring as each control was disconnected.

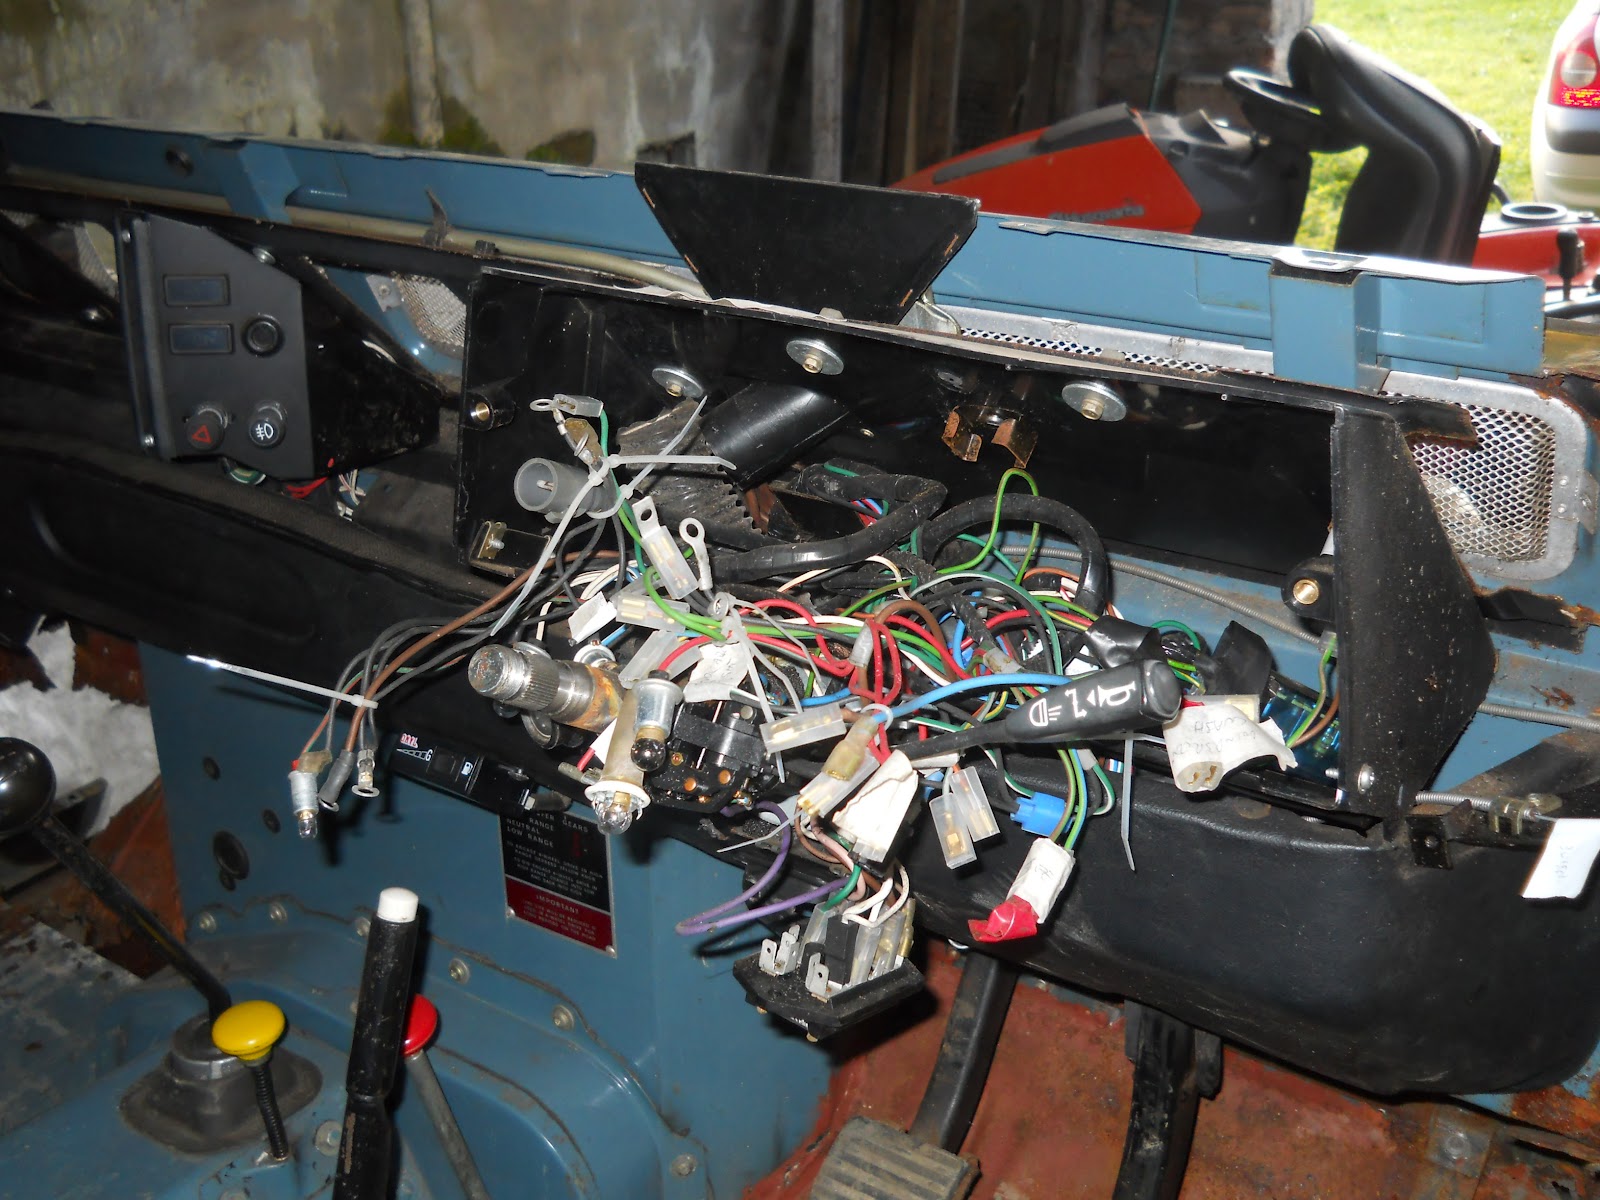
The red wire goes to the..... no the blue wire goes to the....
After this I removed the centre console, which was fitted to later series 3's and housed the hazard warning and fog  light controls. 

I have also decide, upon reassembly to house the gas conversion switch control in here as well, re routing through the bulkhead higher up.


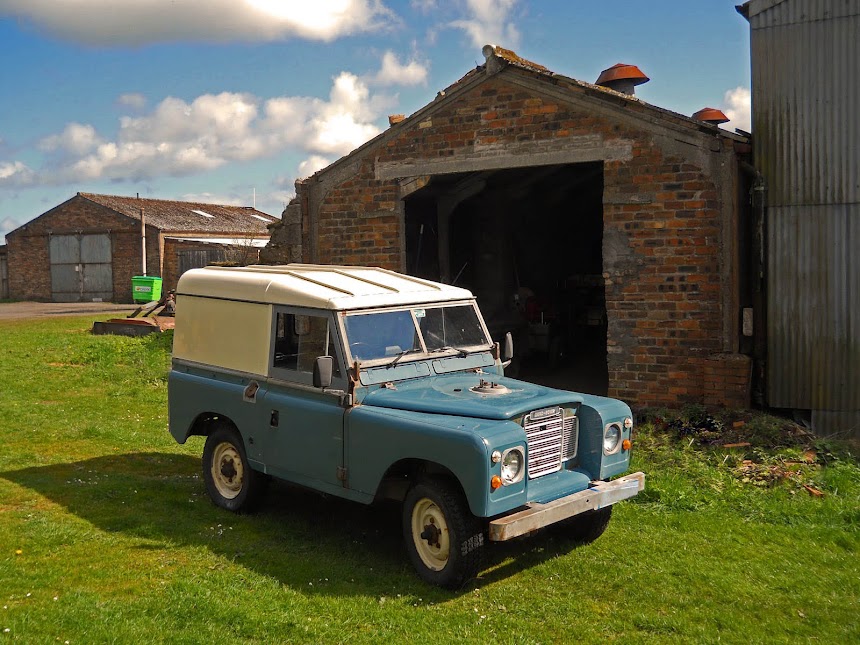
I want the dash layout to look as near original as possible and there is plenty of options to add controls without spoiling the authenticity.

Finally for this evening, I removed the wiper motor and gears and the washer tubes, thus leaving the left hand side of the bulkhead clear. I also spent a bit of time boxing up parts.

Wednesday 9 May 2012

And there off......!

The doors that is! This evening was a nice surprise as I had enough brownie points to get a couple of hours in the barn and work on part of the project that I had been looking forward to. 


Removing the windscreen and the doors brings to an end the major parts  removal and sees me turn a corner. This was a part of the project that I was looking forward to as it now exposes the bulkhead and allows me to end this week with most of the parts now off the vehicle. This last stage was quite interesting as there are quite a few fiddly parts to remove from the bulkhead, such as door stays, windscreen ties and the such that have to come off and should not be overlooked. Still a pleasant evening where you can stay largely clean helped to make it enjoyable.

The roof and back end of the vehicle will remain largely untouched as part of this phase of the rebuild. Once it is back on the road, I intend to eventually replace the van top with a safari top complete with internal upholstery.

Next week I shall be removing the dash and getting to grips with labelling the electrics, removing the steering column and brake master.

I shall also be looking to assess some of the removed parts and start to clean up, rub down and prepare parts to be put back on.


I also need to box up, in a logical order, some of the bagged parts and store them safely.

Inspiration

When carrying out a restoration or rebuild of any kind, it often helps to have a clear idea of what you are are trying to achieve. Today, I found mine. 

Copyright Land Rover Centre.
This vehicle, recently for sale with the Land Rover Centre, Huddersfield, exhibits what I consider to be the closest  to an original spec and features detail that I would like to return mine to, namely the wing mounted 'wing mirrors' and the central number plate position. Small features such as the chrome hub cabs help to add a level of authenticity to the vehicle.

The Landrover Centre can be found at www.landrovercentre.com

Tuesday 8 May 2012

And the band played on....

Well another lovely sunny evening spent in the barn continuing the strip down. The evening was really successful as the LH wing was removed, the grille plate at the front along with various 'internal' parts such as the heater box and air intake. 

This was followed by various gromet housings and parts fixed along the bulkhead. My plan is moving left to right towards the fiddly brake housings.


No where can I find half a boat for the rear...?


The next step moves onto the windscreen removal, doors and some of the internal fixings that bolt onto the bulkhead. At this point, it is time to take stock and update my list of parts and replacements that are needed.


The galvanised bulkhead is now on order.


 All good fun!

Friday 4 May 2012

Redbull gives you wings!

Redbull may give you wings but a socket set removes them! Yes, the surgery continues as the reluctant bolts are removed and the parts come away. Two hours this evening saw the bumper removed and placed in the 'skip it' bin. 

The left wing was slowly removed . 

There are a few bolts to remove on this side,and the amount will differ depending upon the engine variant and the model, series 2, 2A or 3. On this one, these include the wing to bulkhead (4), wing to front grille (4), inner wing stay (1), front sill stay (1) a couple of wiring harness clips (2) and the bonnet arm clamp (3) . The rust has taken its toll on these and they all will be all replaced with new. Thank god for penetrating spray!

The footwell rust becomes clear
The decision to remove the bulk head was the right one as the extent of the rust and decay is becoming obvious as each layer is peeled away. The good thing about removing the front is that you can also get better access to the chassis, dampers and springs that will all be replaced as well.

Also stainless steel bolts look a no brainer on the rebuild. Its worth taking your time and enjoying the strip down as there is very little option otherwise.

Next job, the other wing and the front grille plate.